ClickHouse
Source and destination
Polytomic connects to ClickHouse using your ClickHouse hostname and database credentials:
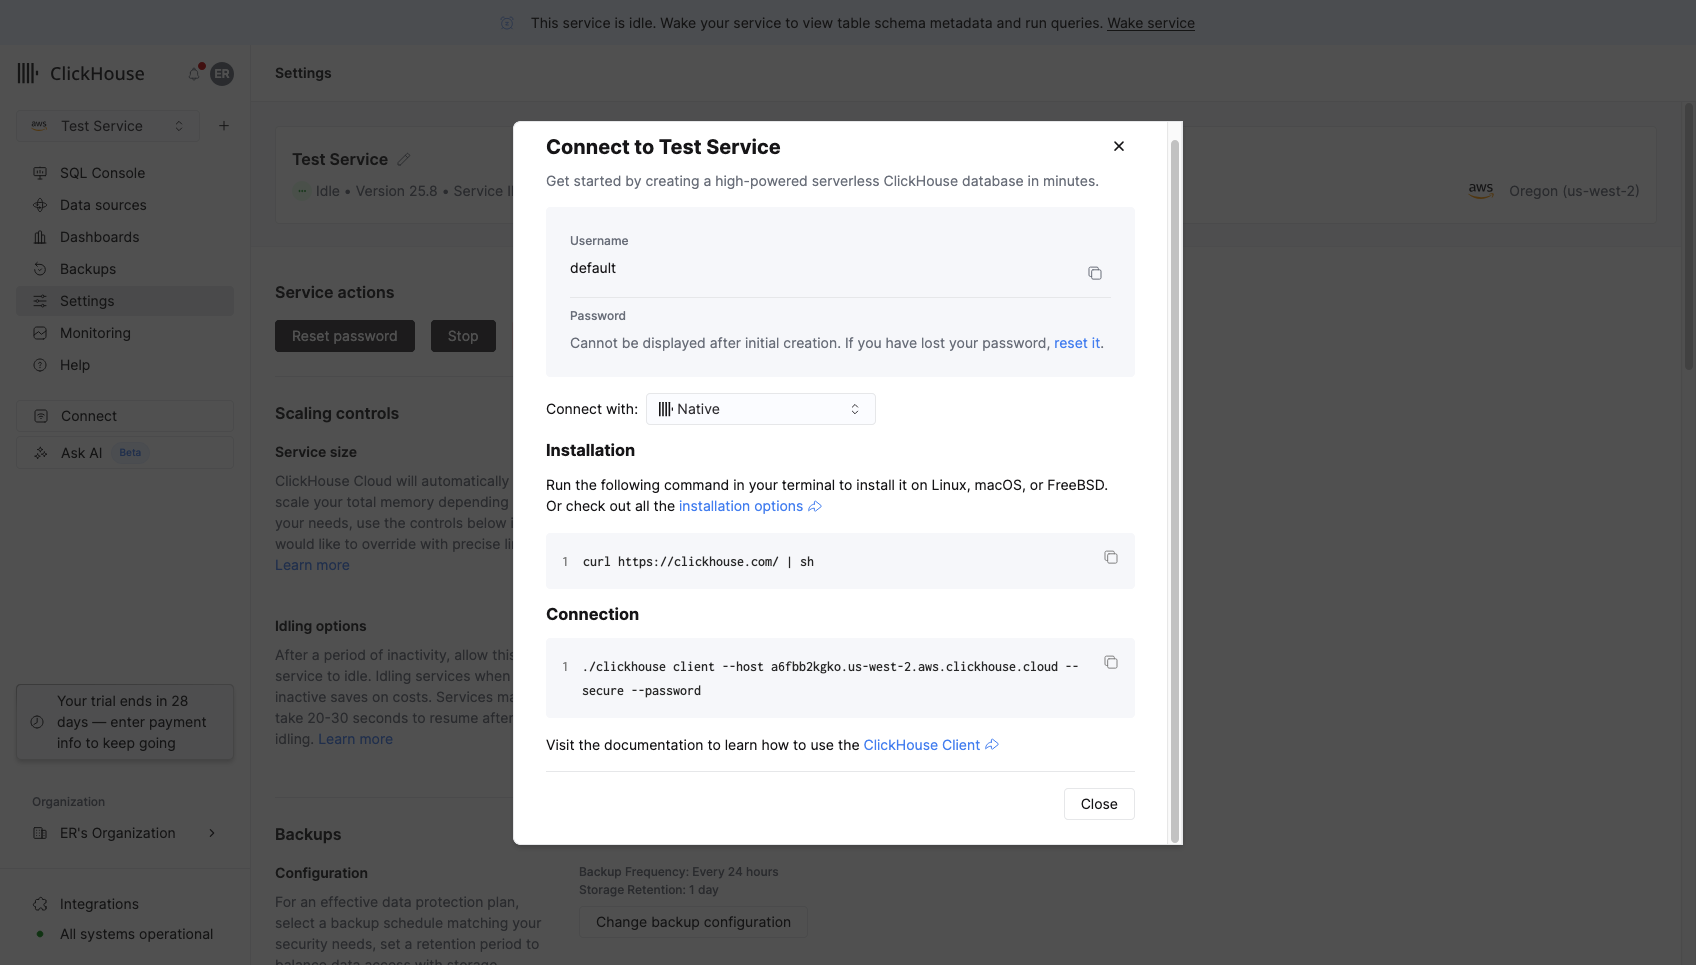
- In your ClickHouse console, show your connection information for the Native protocol. The popup will look like this:
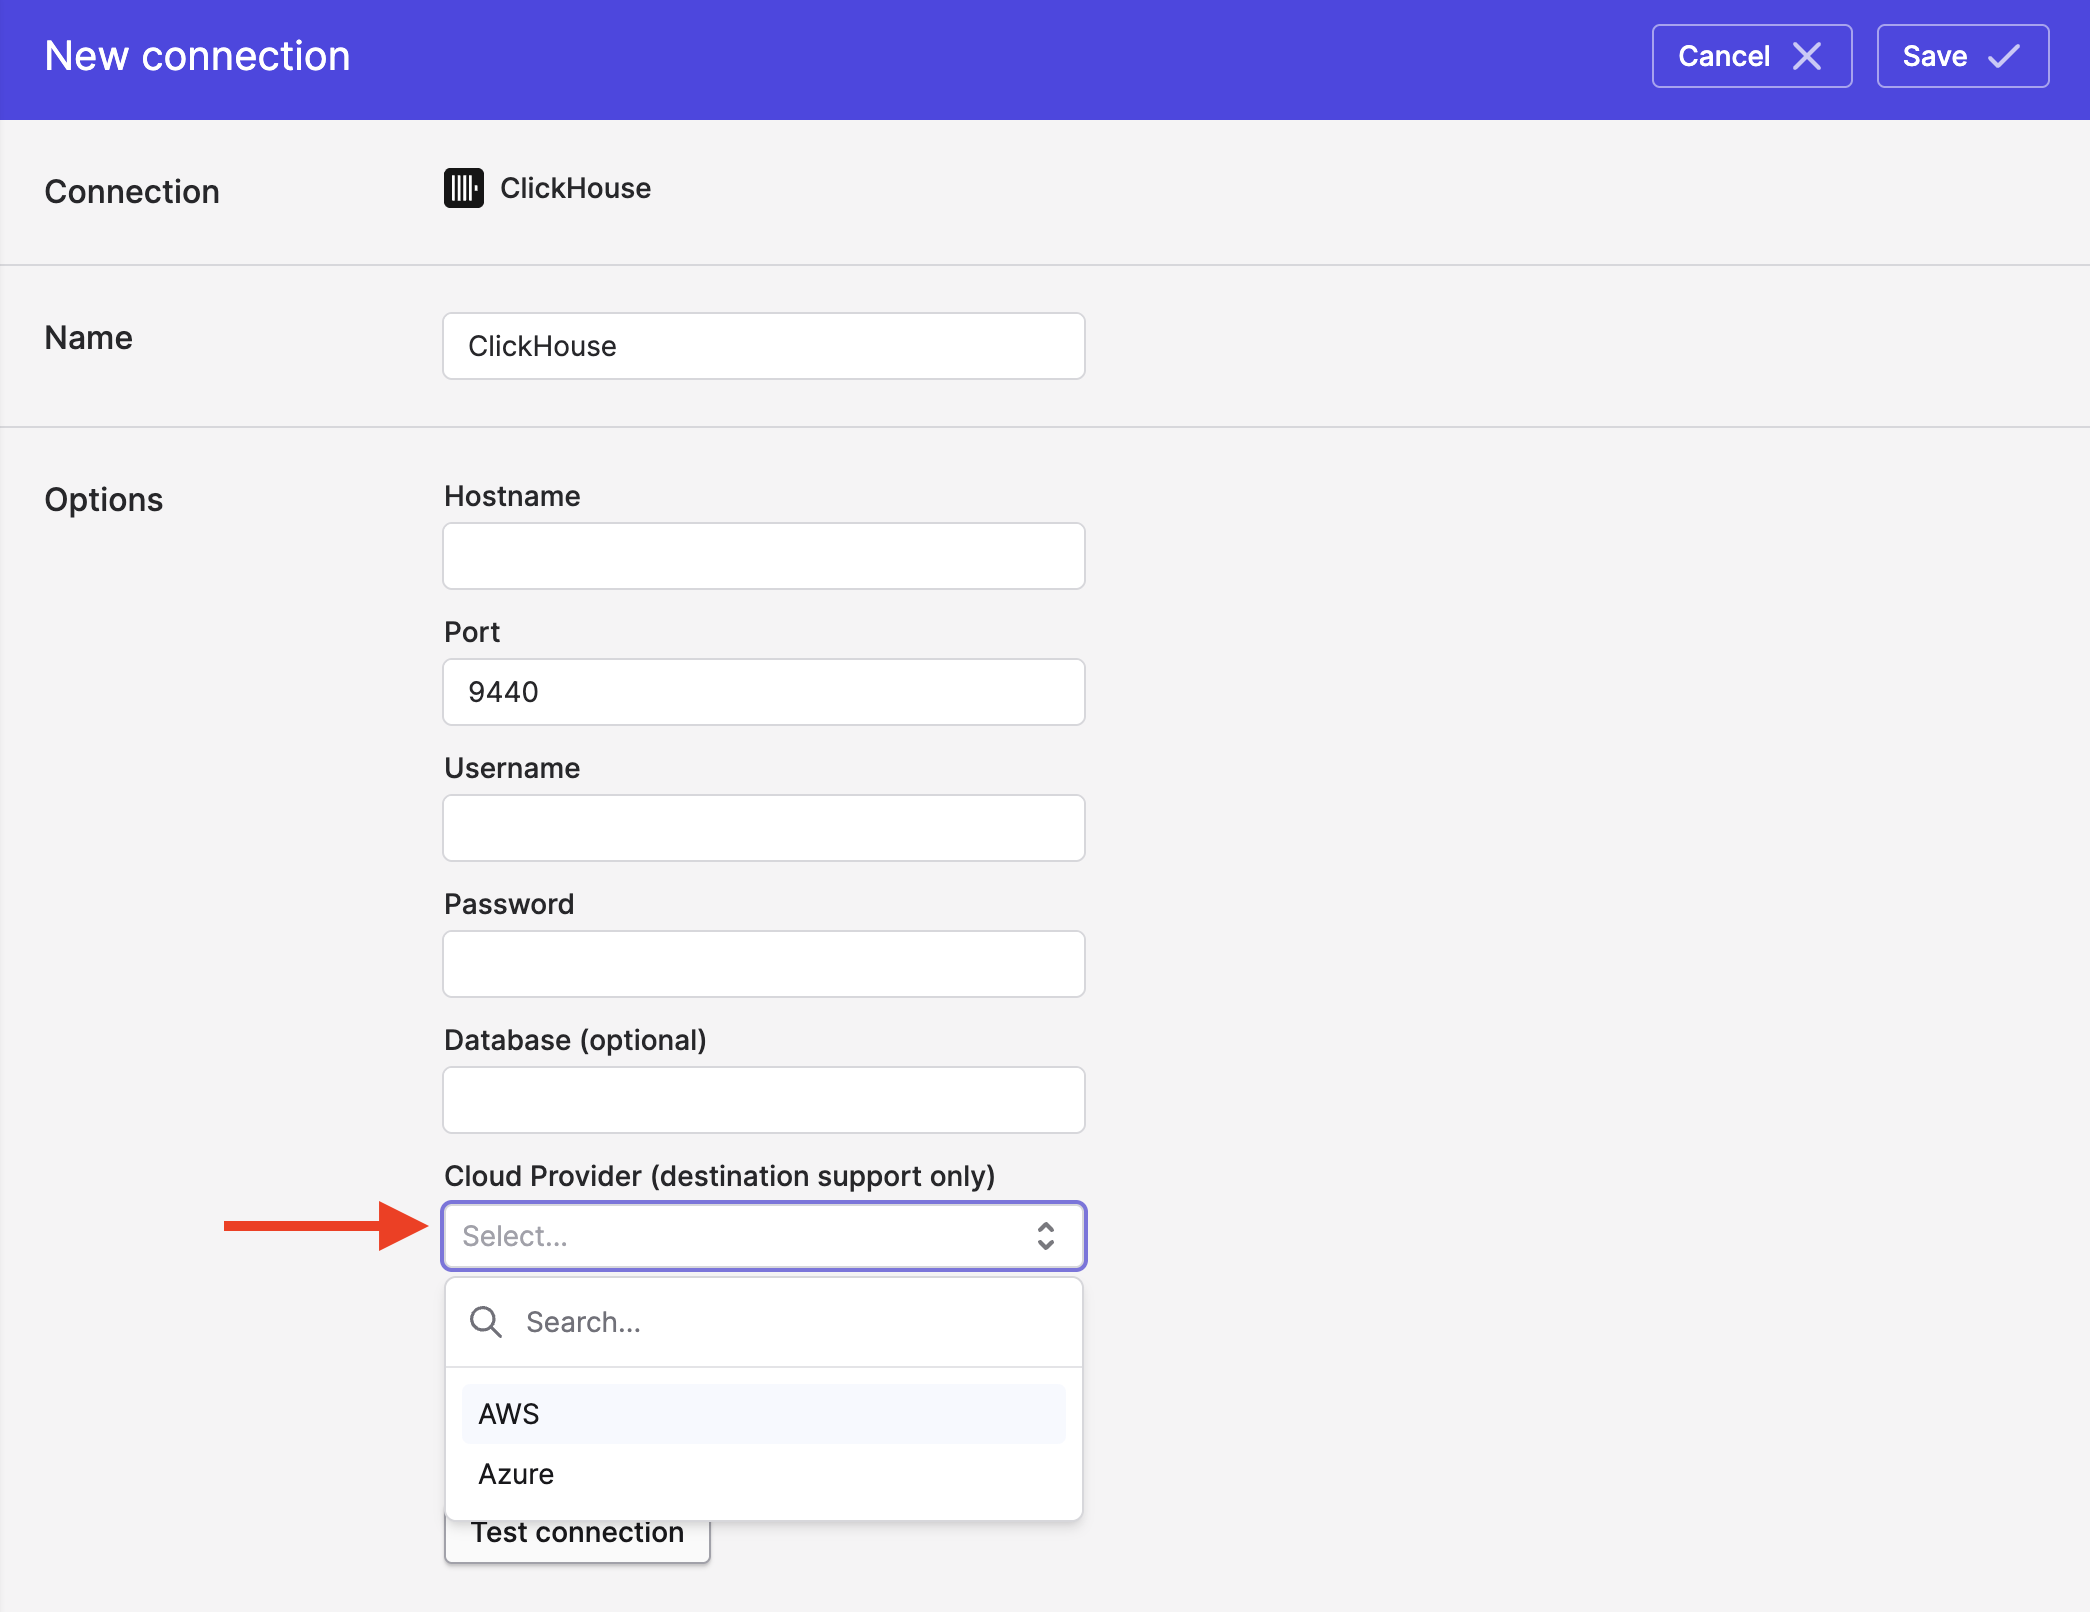
- In Polytomic, go to Connections → Add Connection → ClickHouse.
- Paste your ClickHouse connection details in your Polytomic connection fields:

- Click Save.
Polytomic commonly connects to Clickhouse through either port 9440 (if connecting with SSL) or port 9000.
Writing to ClickHouse
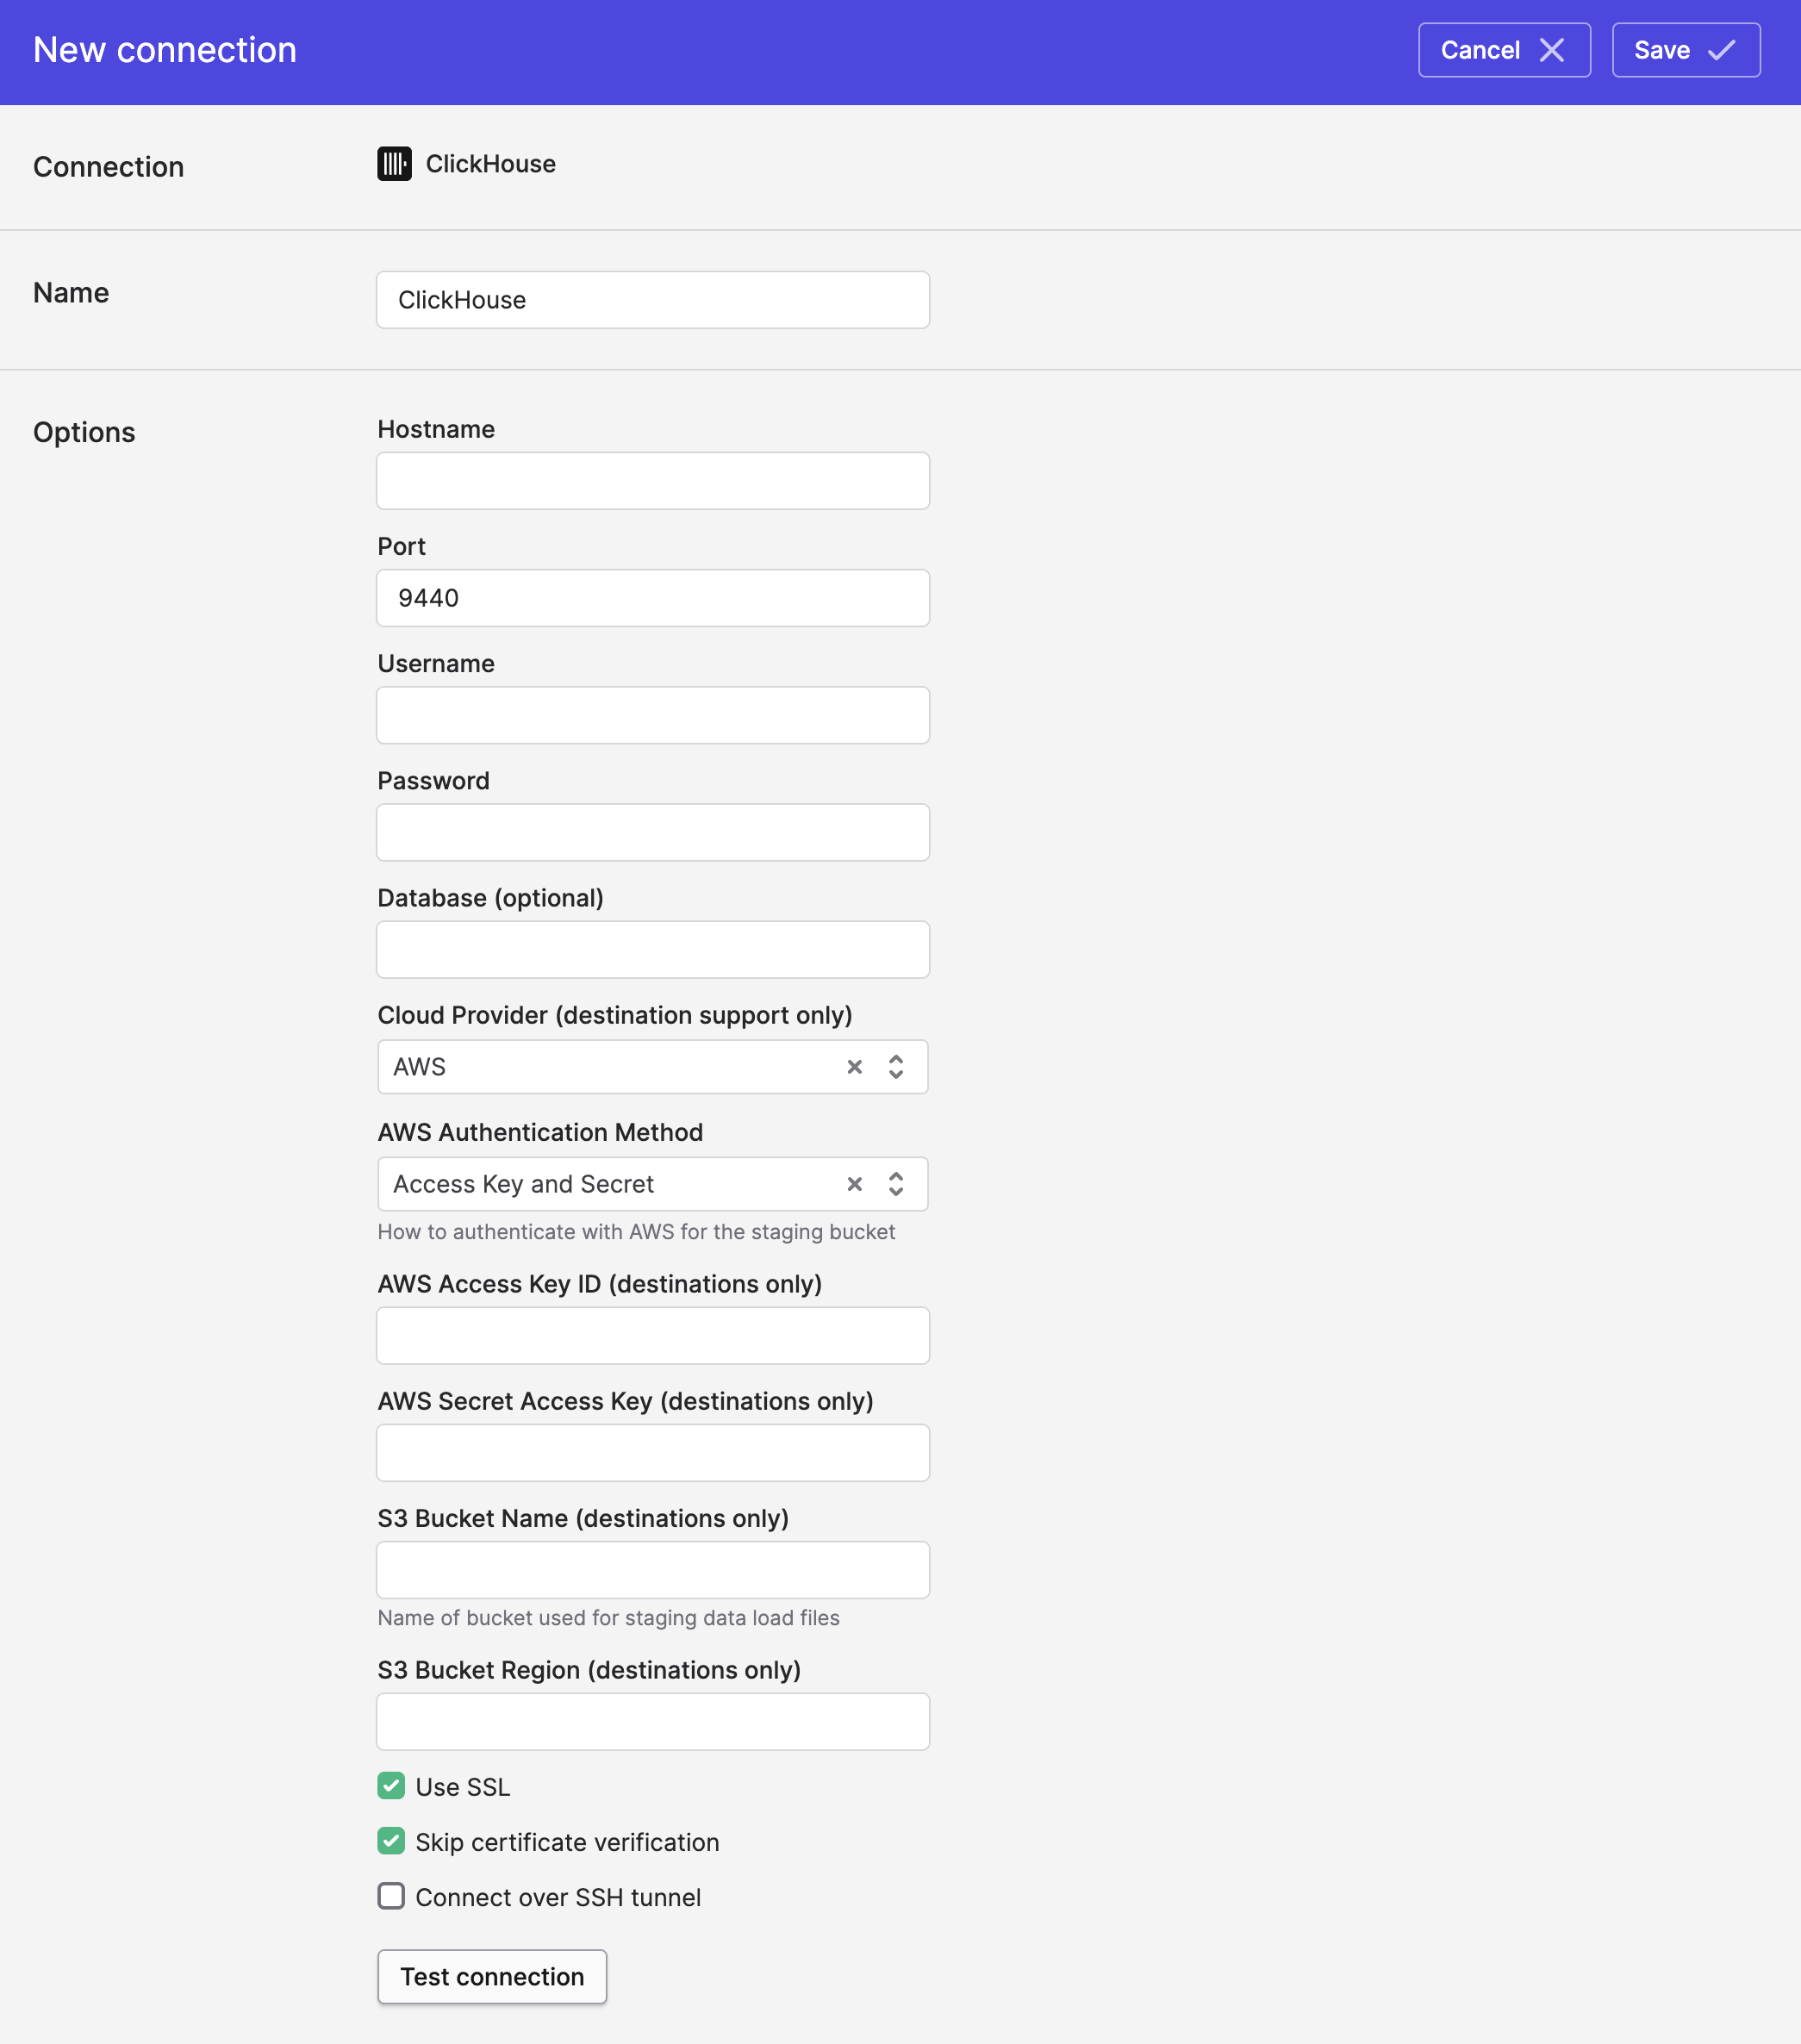
If you will be writing to ClickHouse, you'll need to select your cloud provider and provide access credentials to a cloud storage bucket (Polytomic will use this as a staging area):
Writing to ClickHouse on AWS
(For connecting to ClickHouse on Azure, see the next section.)
To enable Polytomic to write to your ClickHouse instance, you'll need to provide the following information:
- S3 bucket name (Polytomic uses an S3 bucket to stage data for syncs into ClickHouse).
- S3 bucket region (e.g. us-east-1 or such).
- Either:
- An AWS Access Key ID and Secret, or
- An AWS IAM Role ARN which Polytomic will assume when staging data into the bucket (see instructions here .
Writing to ClickHouse on Azure
To enable Polytomic to write to your Azure ClickHouse instance, you'll need to provide an Azure Storage container for Polytomic to stage data in:
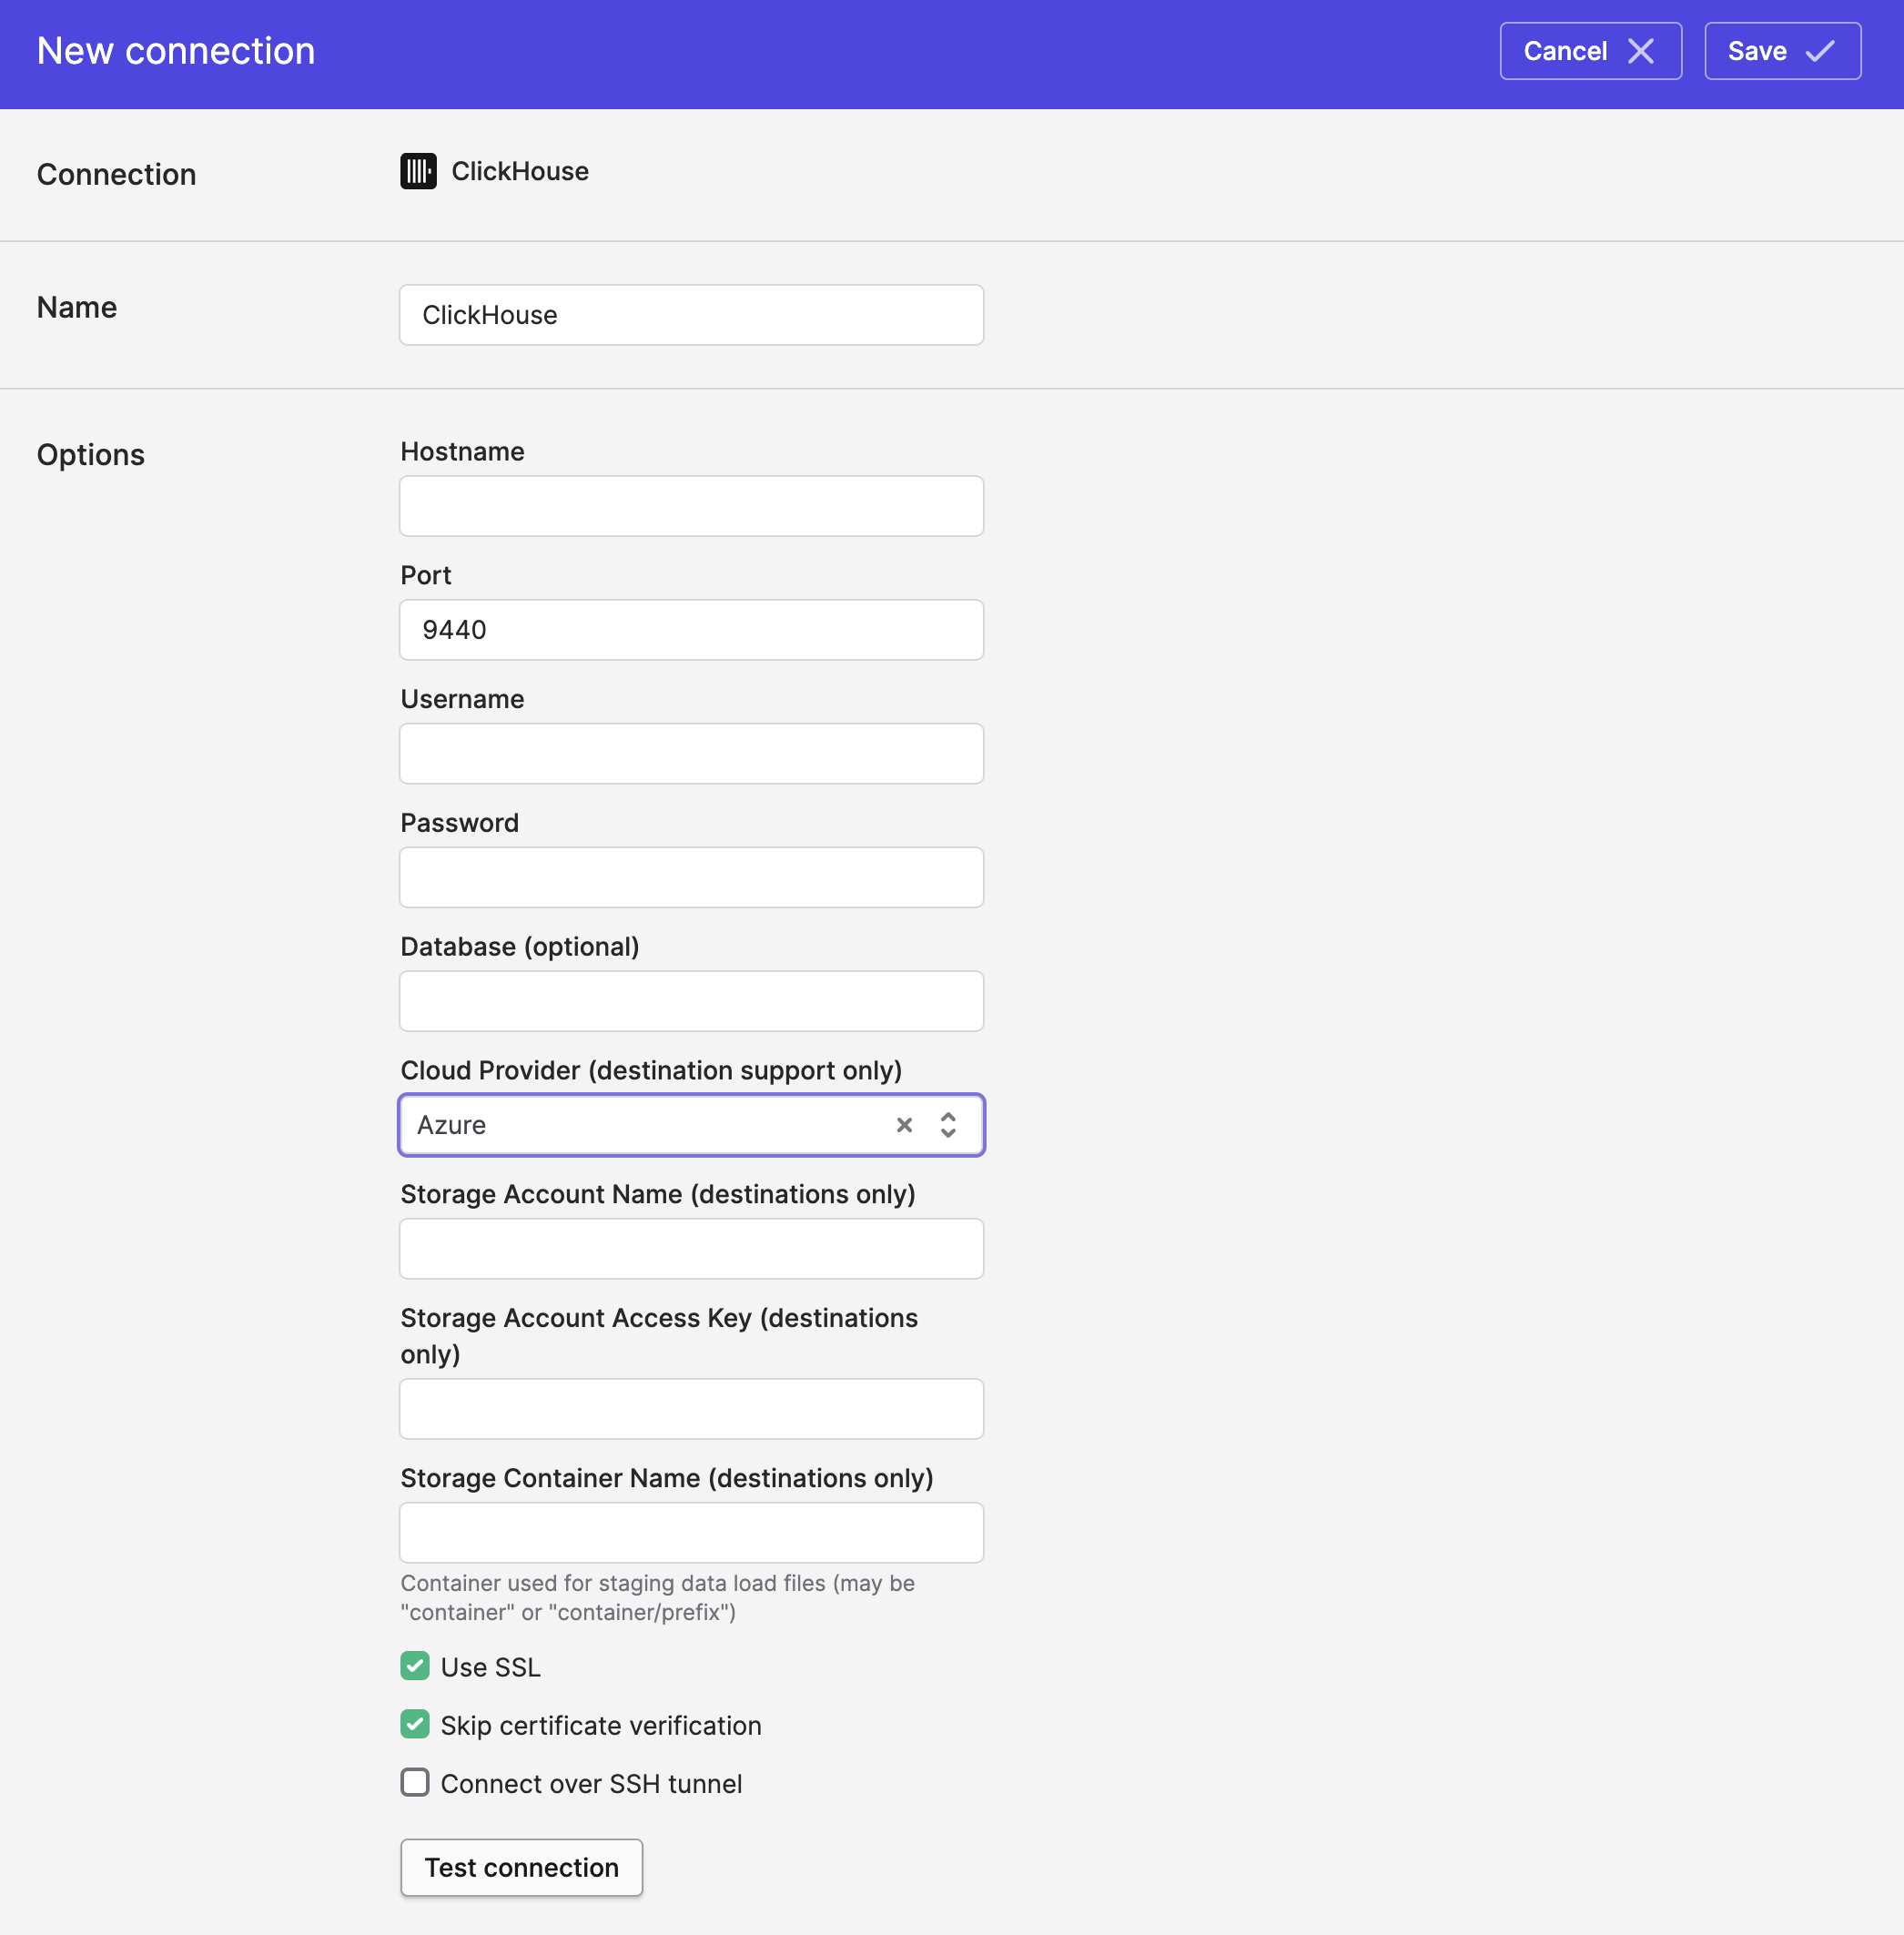
You will need to enter the following values in Polytomic:
- Azure Storage account name: the account name that contains the container Polytomic will write to.
- Azure Storage access key: the access key associated with the storage account.
- Azure Storage container name: the container that Polytomic will write to.