AWS S3
Source and destination
Polytomic offers the following methods for connecting to S3:
- AWS Access Key ID and Secret
- AWS IAM role
Each method is covered in its respective section below.
Connecting with an AWS Access Key ID and Secret
- In Polytomic, go to Connections → Add Connection → S3.
- For Authentication method, select Access Key and Secret.

- Enter the following information:
-
AWS Access ID.
-
AWS Secret Access Key.
-
S3 bucket region (e.g.
us-west-1). -
S3 bucket name.
The S3 bucket name may contain an optional path which will limit access to a subset of the bucket. For example, the bucket name
output/customerswill limit Polytomic to thecustomersdirectory in theoutputbucket.
- Click Save.
Connecting with an AWS IAM Role
Authenticating with IAM RolesSee Using AWS IAM roles to access S3 buckets for detailed documentation on configuring Polytomic connections with IAM roles.
- In Polytomic, go to Connections → Add Connection → S3.
- For Authentication method, select IAM role.
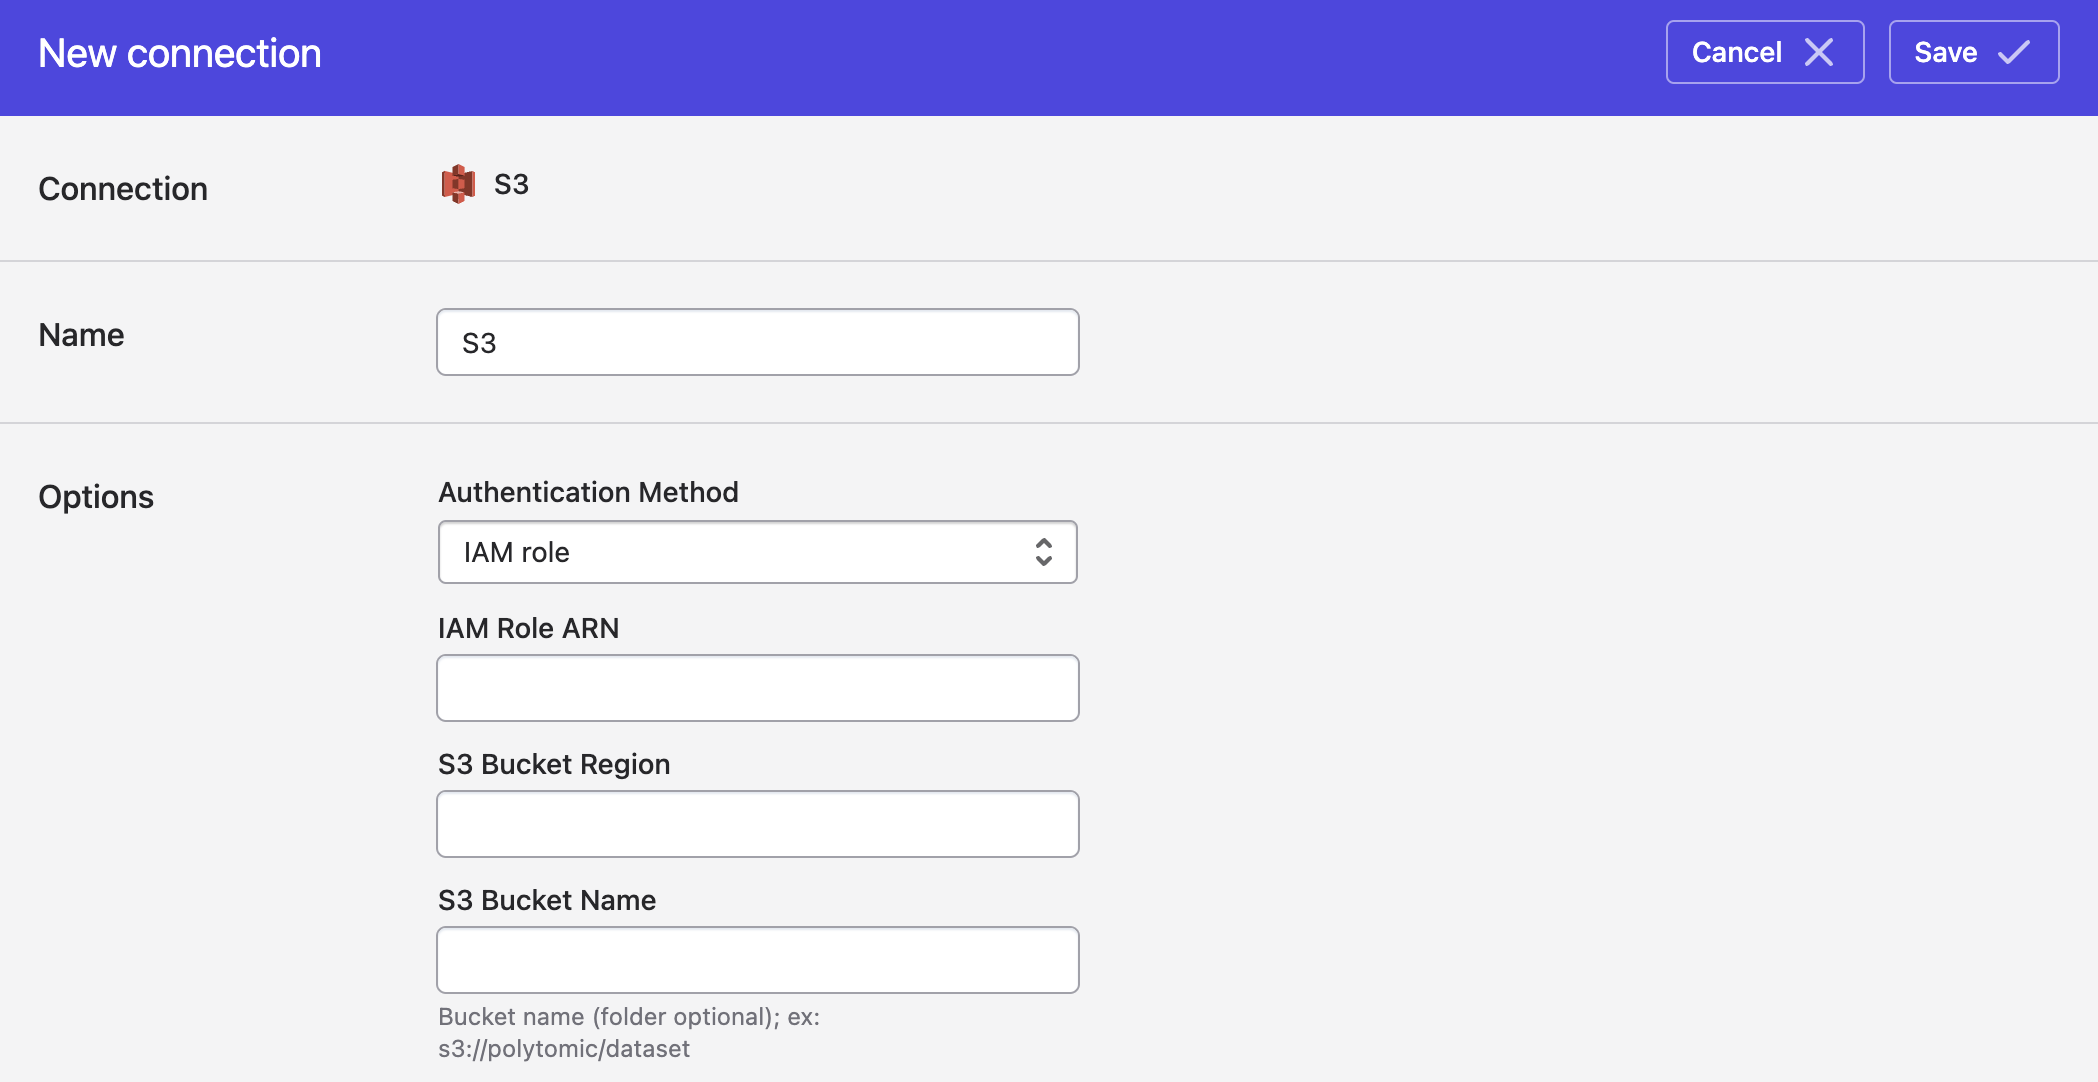
- Enter values for the following fields:
- IAM Role ARN.
- S3 bucket region (e.g.
us-west-1). - S3 bucket name.
The S3 bucket name may contain an optional path which will limit access to a subset of the bucket. For example, the bucket nameoutput/customerswill limit Polytomic to thecustomersdirectory in theoutputbucket.
- Click Save.
Getting Around IAM Conditions that Restrict IP Addresses
If you use explicit IAM conditions based on IP addresses, you must also add a condition to allow our VPC endpoint vpce-09e3bfdd1f91f0f84. For example:
{
    "Version": "2012-10-17",
    "Statement": {
        "Effect": "Deny",
        "Action": "*",
        "Resource": "*",
        "Condition": {
            "NotIpAddress": {
                "aws:SourceIp": [
                    "192.0.2.0/24",
                    "203.0.113.0/24"
                ]
            },
            "StringNotLikeIfExists": {
                "aws:SourceVPCe": [
                    "vpce-09e3bfdd1f91f0f84"
                ]
            }
        }
    }
}
S3 Permissions
The permissions Polytomic requires on an S3 bucket depend on whether you are using the connection as a source (reading) or a destination (writing).
Reading from S3
To use an S3 connection as a source, Polytomic requires the following permissions on the bucket and its contents:
s3:GetObjects3:ListBucket
For example, a valid read-only IAM policy for a bucket syncinput would be as follows.
{
    "Version": "2012-10-17",
    "Statement": [
        {
            "Sid": "PolytomicBucketRead",
            "Effect": "Allow",
            "Action": [
                "s3:GetObject",
                "s3:ListBucket"
            ],
            "Resource": [
                "arn:aws:s3:::syncinput/*",
                "arn:aws:s3:::syncinput"
            ]
        }
    ]
}
Writing to S3
To use an S3 connection as a destination, Polytomic requires the following permissions on the bucket and its contents:
s3:ReplicateObjects3:PutObjects3:GetObjects3:ListBuckets3:DeleteObject
For example, a valid IAM policy for a bucket syncoutput would be as follows.
{
    "Version": "2012-10-17",
    "Statement": [
        {
            "Sid": "PolytomicBucketWrite",
            "Effect": "Allow",
            "Action": [
                "s3:ReplicateObject",
                "s3:PutObject",
                "s3:GetObject",
                "s3:ListBucket",
                "s3:DeleteObject"
            ],
            "Resource": [
                "arn:aws:s3:::syncoutput/*",
                "arn:aws:s3:::syncoutput"
            ]
        }
    ]
}
Syncing from S3
Use Bulk Syncs to sync from S3 to your database warehouses, databases, and other cloud storage buckets.
Use Model Syncs to sync from S3 to your SaaS applications, spreadsheets, and webhooks.
Concatenating multiple CSV or JSON files into one table
When using Polytomic's Bulk Sync functionality to sync from S3, you have the option of having Polytomic concatenate all CSV or JSON files from a single bucket directory into one table in your data warehouse. You can do by turning on the Files are time-based snapshots setting in your connection configuration:
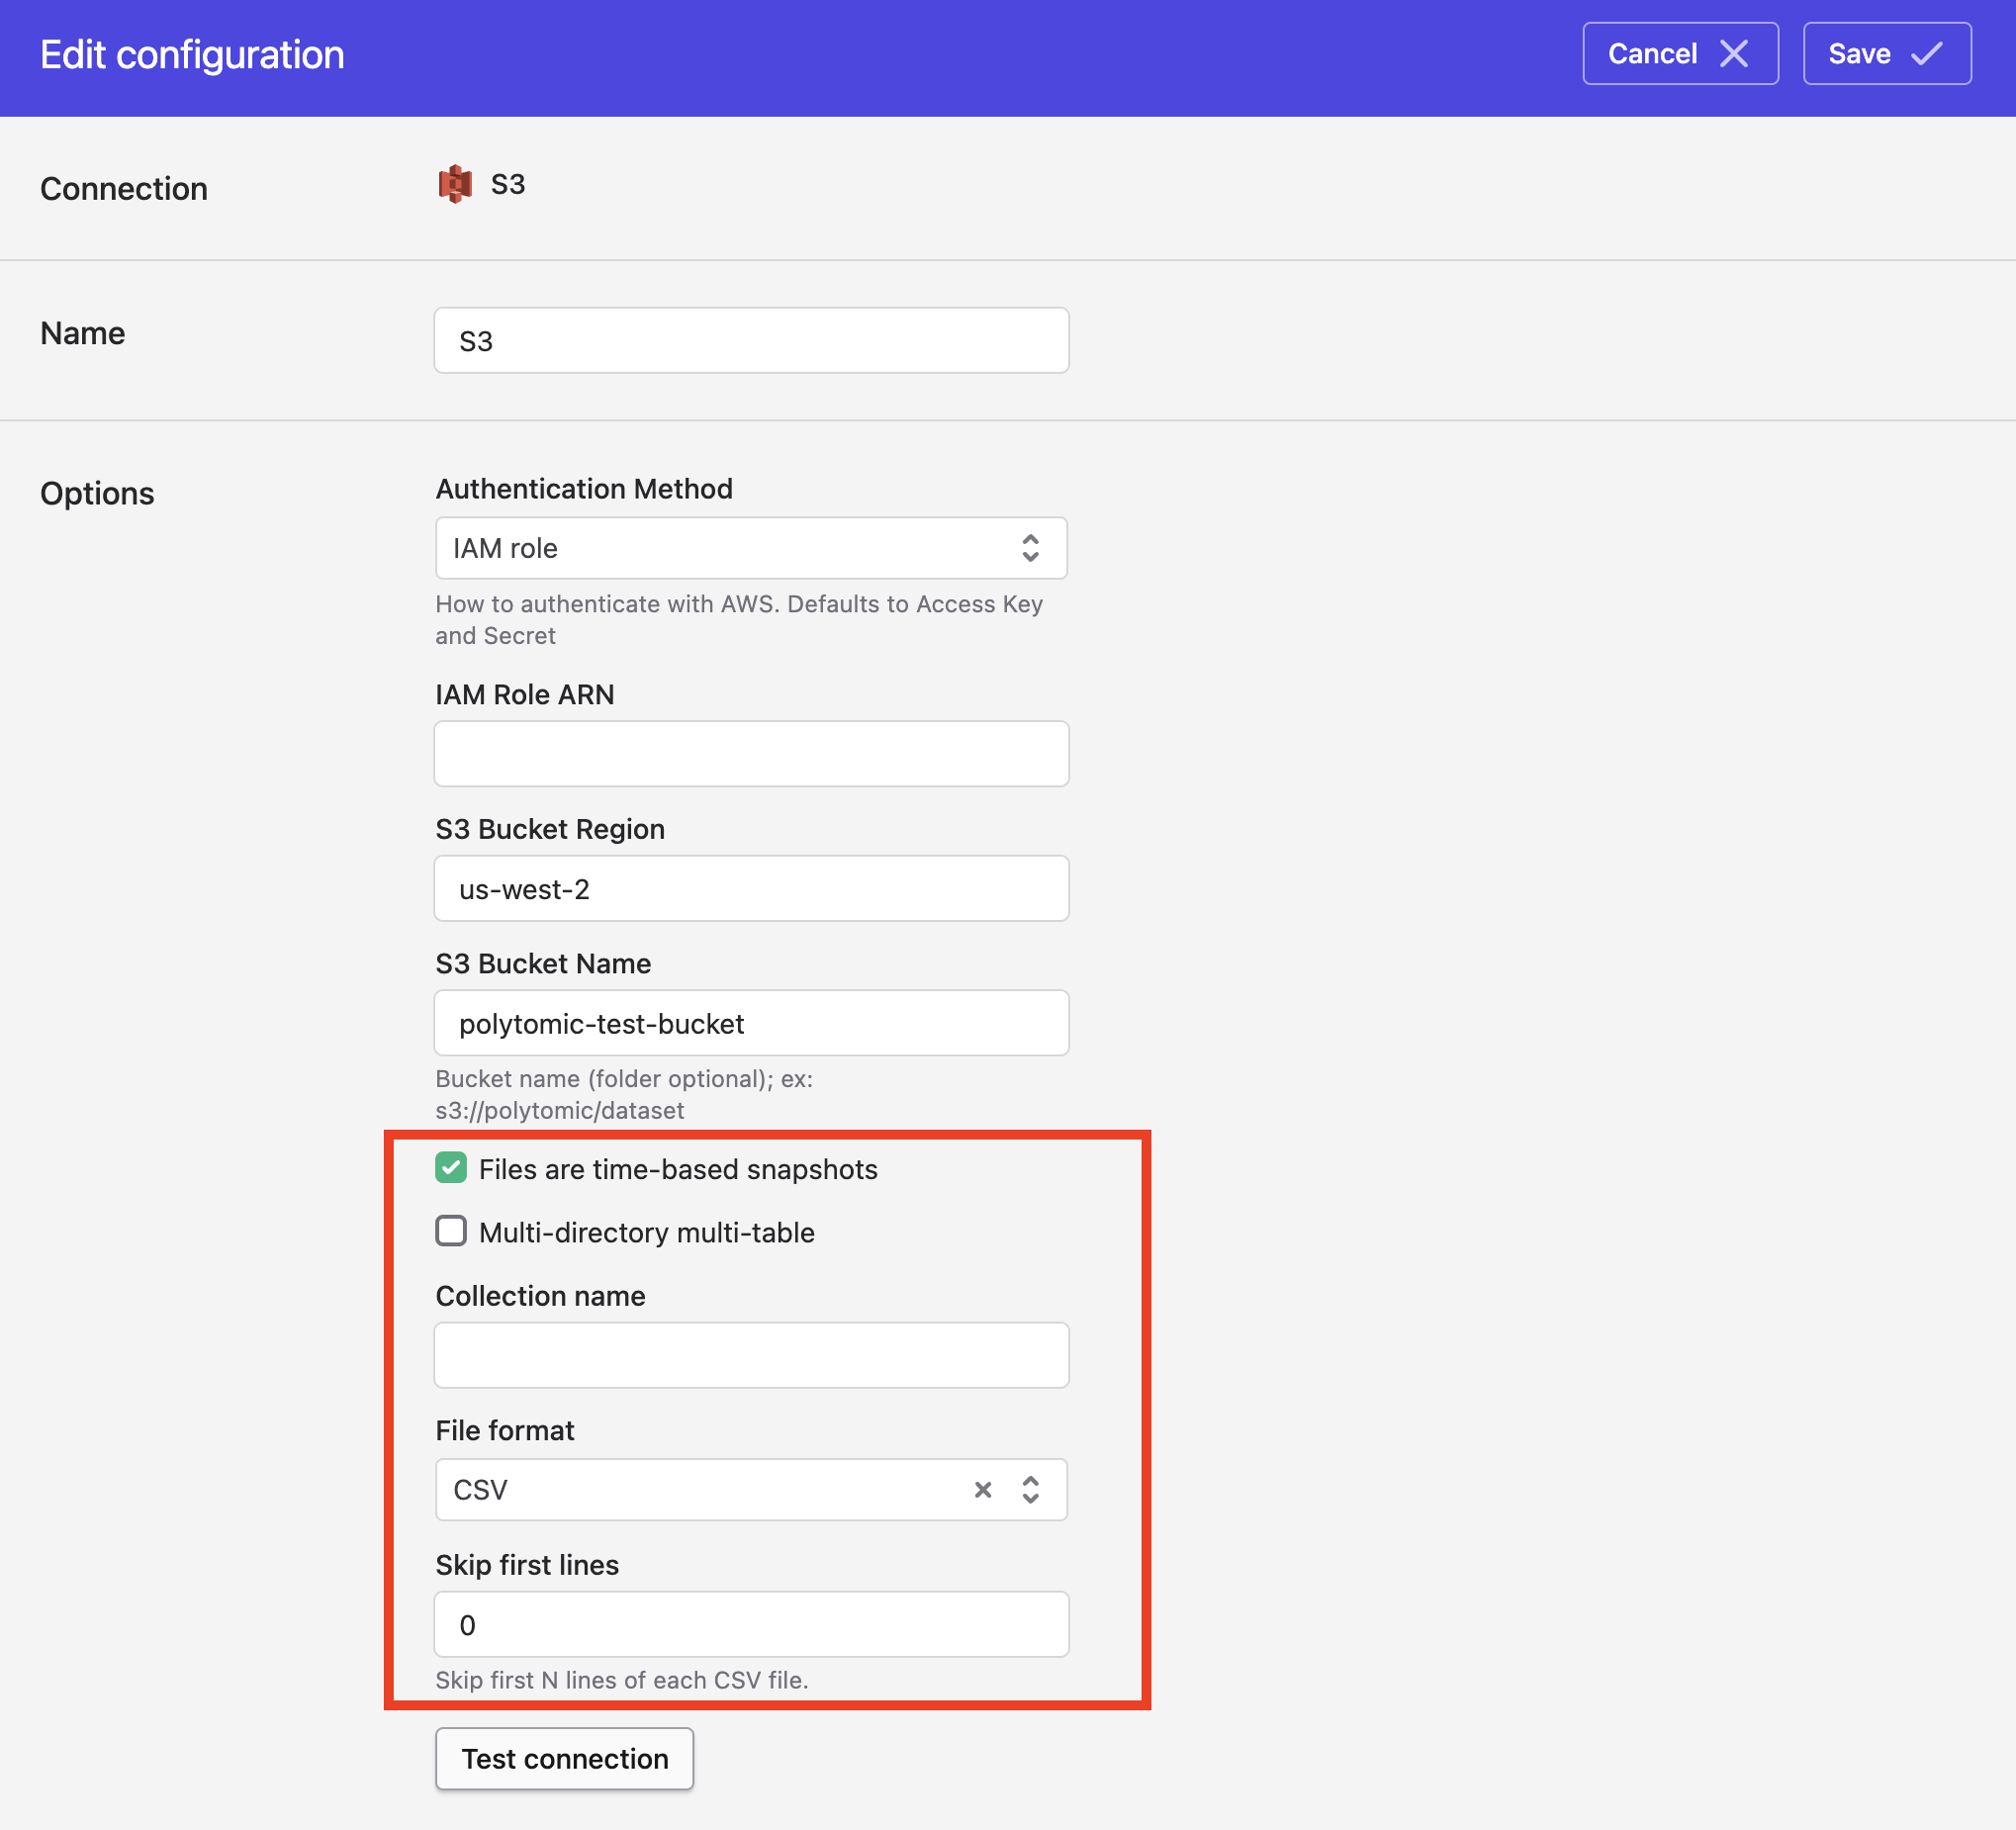
Once you turn on this setting, you will also need to specify these settings:
- Collection name: This will be the name of the resulting SQL table in your data warehouse (or file name if syncing to another cloud storage bucket).
- File format: Instructs Polytomic to either concatenate all CSV files in the bucket or all JSON files.
- Skip first lines: If your CSVs have lines at the top that need to be skipped before getting to the headers for your data, you can specify the number of lines Polytomic should skip in this field.
Files spread across multiple directories
You may have files to concatenate into a single table spread across multiple directories. A common scenario is call transcript data. Your cloud bucket may have this structure with a call ID directory per call:
8746aefa3273ffeedca/transcript.csv7abeffdaec34621891a4/transcript.csv- ...and so on
Your intention in this case would be to get a single table, transcripts, in your data warehouse containing columns from the CSVs and the call ID (i.e. directory name) also being a column on the same table. You can do this in the following manner:
- Turn on the Multi-directory multi-table setting.
- Enter this as your Tables glob path: `
{{ capture("call_id") }}/{{ table() }}.csv - Set your File format to CSV.
- If you'd like Polytomic to skip the first
nlines in your CSV, specify a number greater than 0. Otherwise you can leave this default.
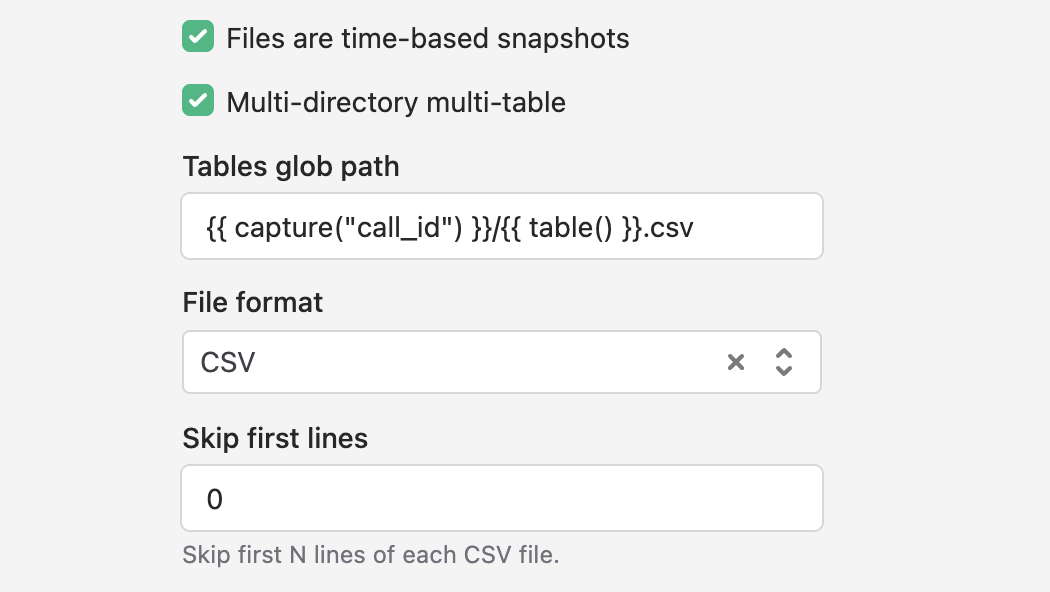
The capture() function is a Polytomic function that will take that portion of your path and add it as a column in your warehouse with the name you've chosen (in this case call_id).
The table() function is a Polytomic function that will designate the name of that CSV file as the table name in your warehouse.