NetSuite
Source and destination
NOTE: If you have the NetSuite SuiteAnalytics module and are looking to sync from NetSuite, skip this page and follow our SuiteAnalytics setup instructions here. Otherwise, continue reading.
Polytomic connects to NetSuite using an Integration record and API-only role.
NetSuite sandbox
Connecting Polytomic to a Netsuite sandbox is no different than connecting to a production instance; the same instructions apply. Indeed, if you have a Netsuite sandbox available we recommend you create two Netsuite connections in Polytomic: one to your sandbox for testing and one to your production instance.
Preparing NetSuite for Polytomic
Polytomic requires that web service-related features be enabled for your NetSuite account
To enable these features navigate to Setup → Company → Enable Features. The click the SuiteCloud tab.
Under SuiteTalk (Web Services) enable "SOAP Web Services" and "REST Web Services"

SuiteTalk features to enable.
Under Manage Authentication enabled "Token-based Authentication"

Authentication features to enable.
Create and Configure an Integration
Netsuite uses an Integration record to authenticate requests from Polytomic.
To create an Integration navigate to Setup → Integrations → Manage Integrations → New.
Give the Integration a name such as "Polytomic" and enable "Token-based authentication".
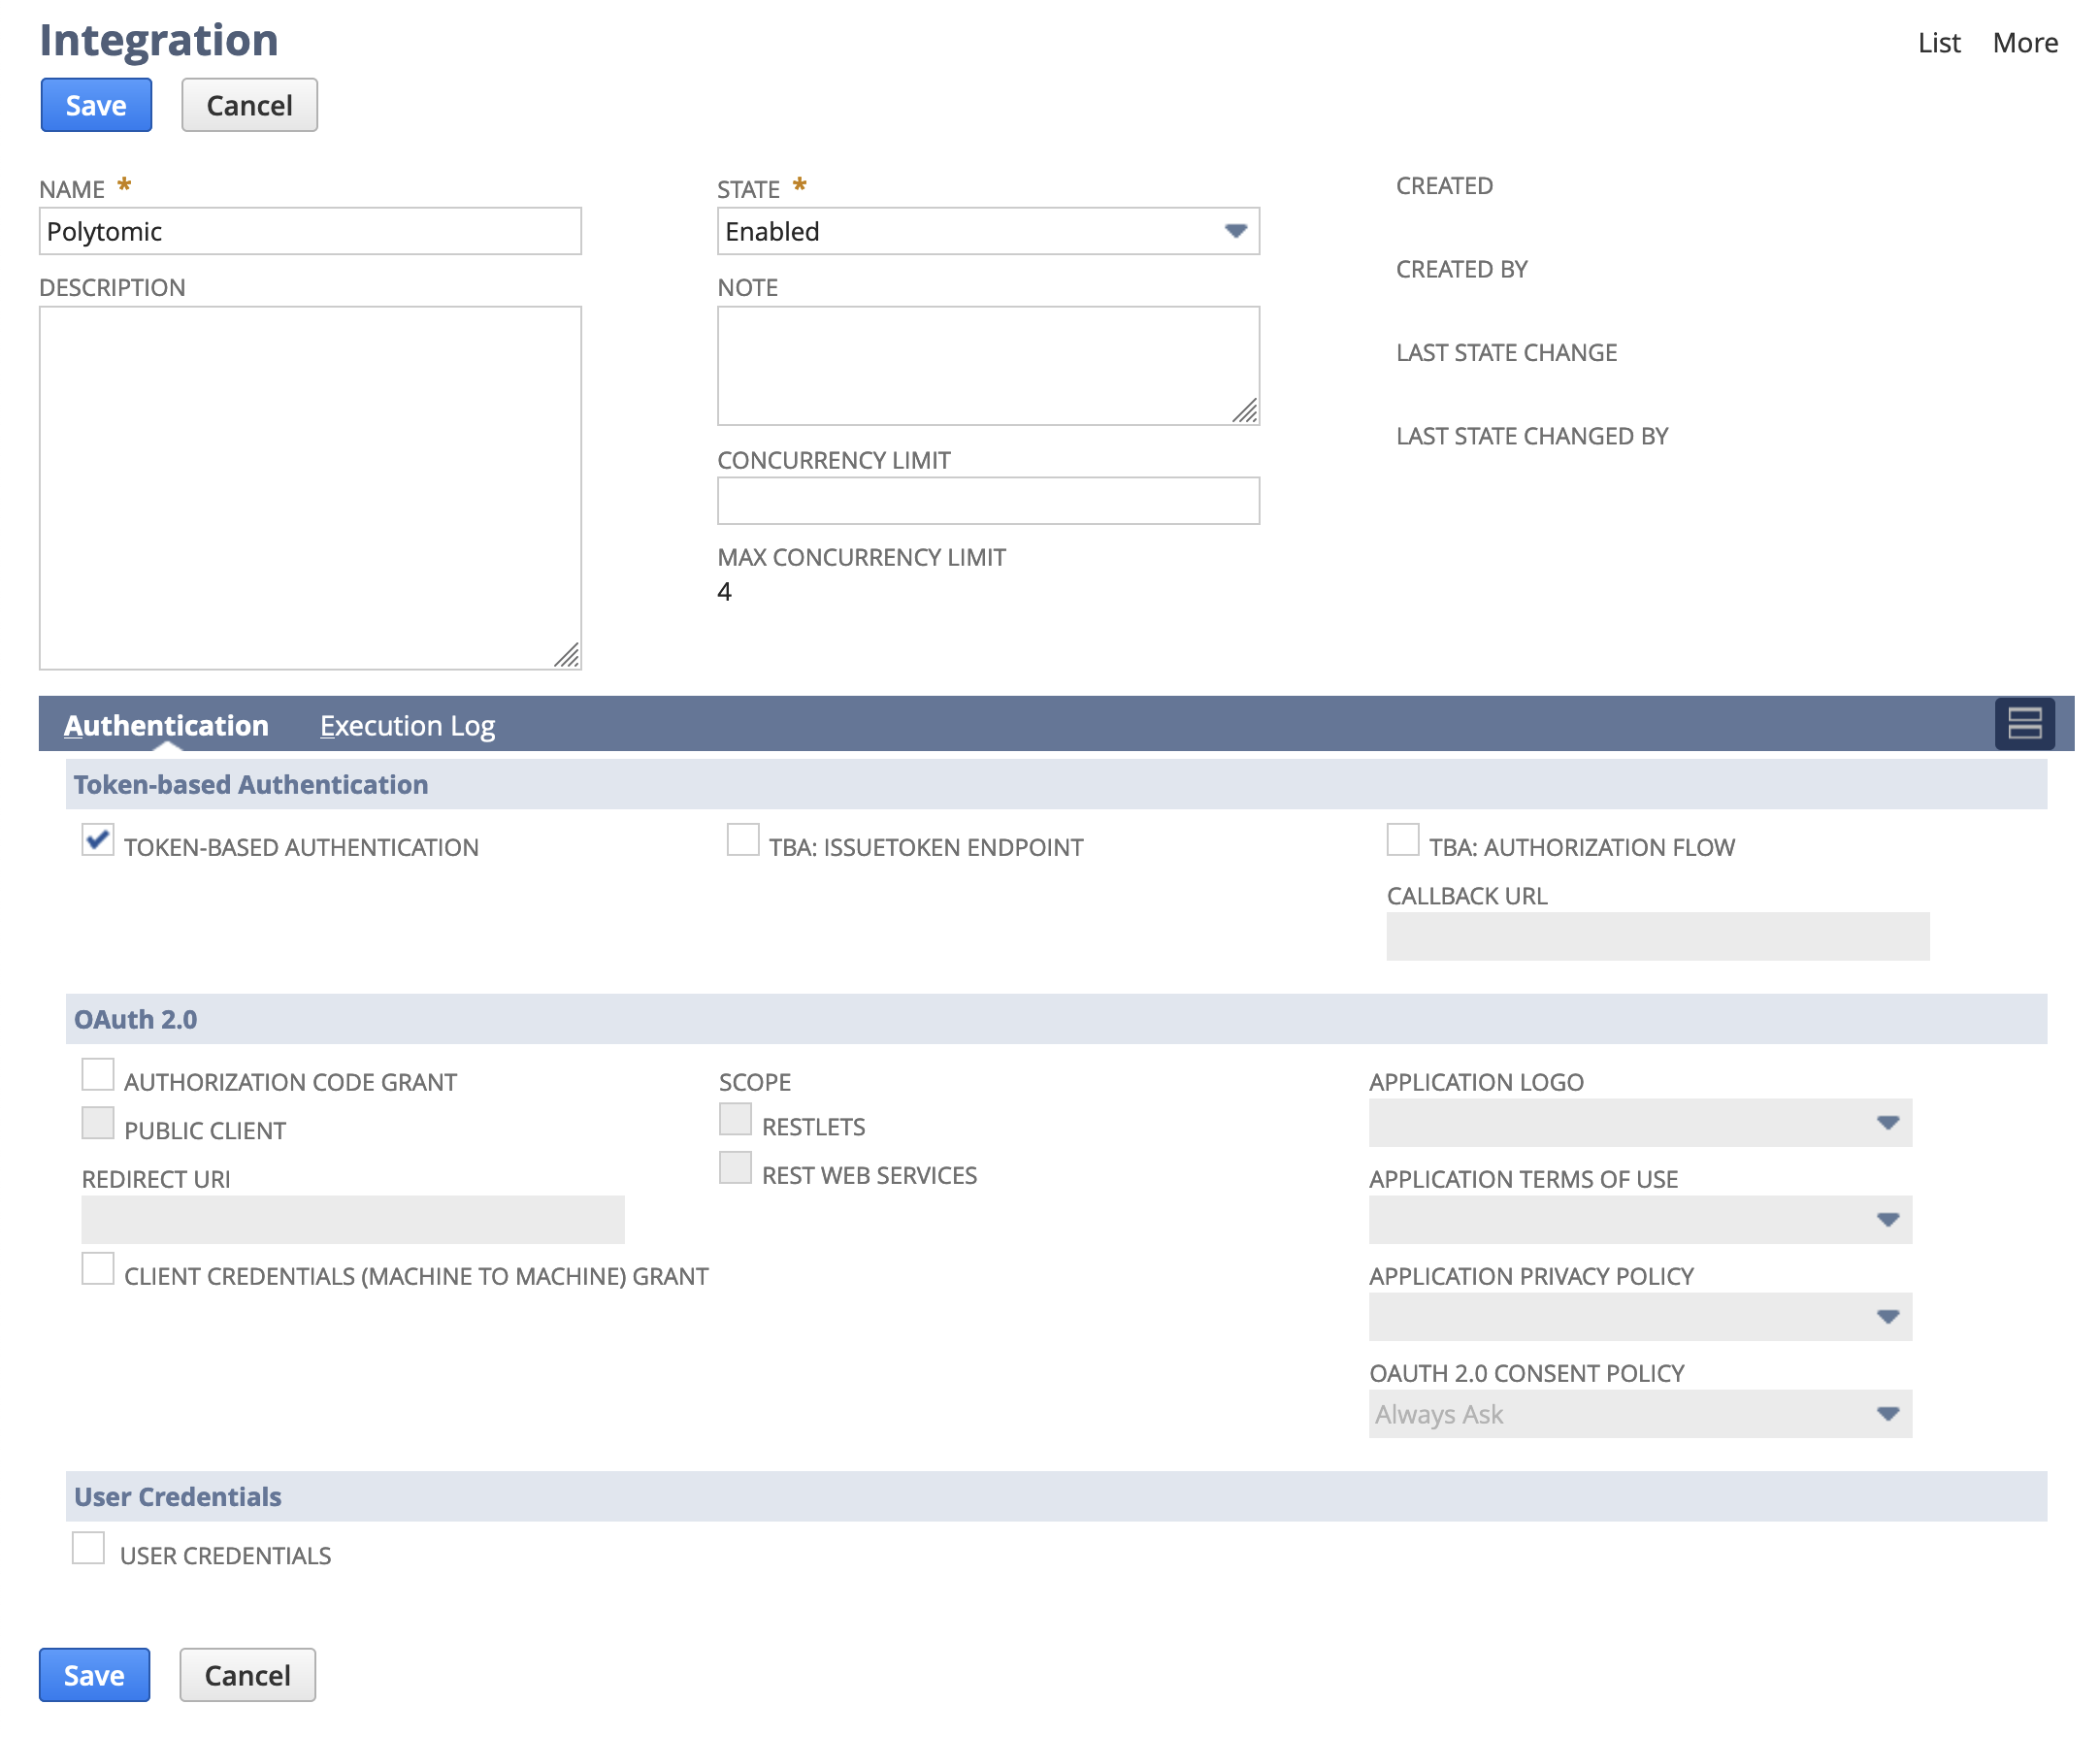
"TBA: Authorization Flow" and "Authorization Code Grant" should be disabled.
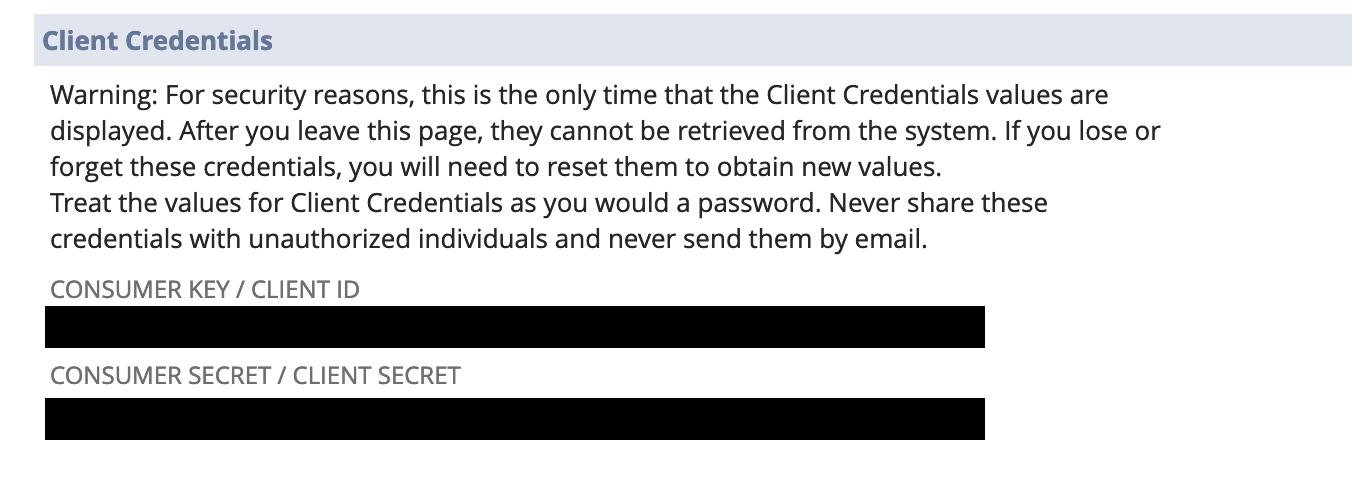
After you click "Save", make a note of the Consumer Key & Consumer Secret listed under Client Credentials. You'll need these when connection Polytomic to Netsuite.
Create a Role
Navigate to Setup → Users/Roles → Manage Roles and click "New Role".
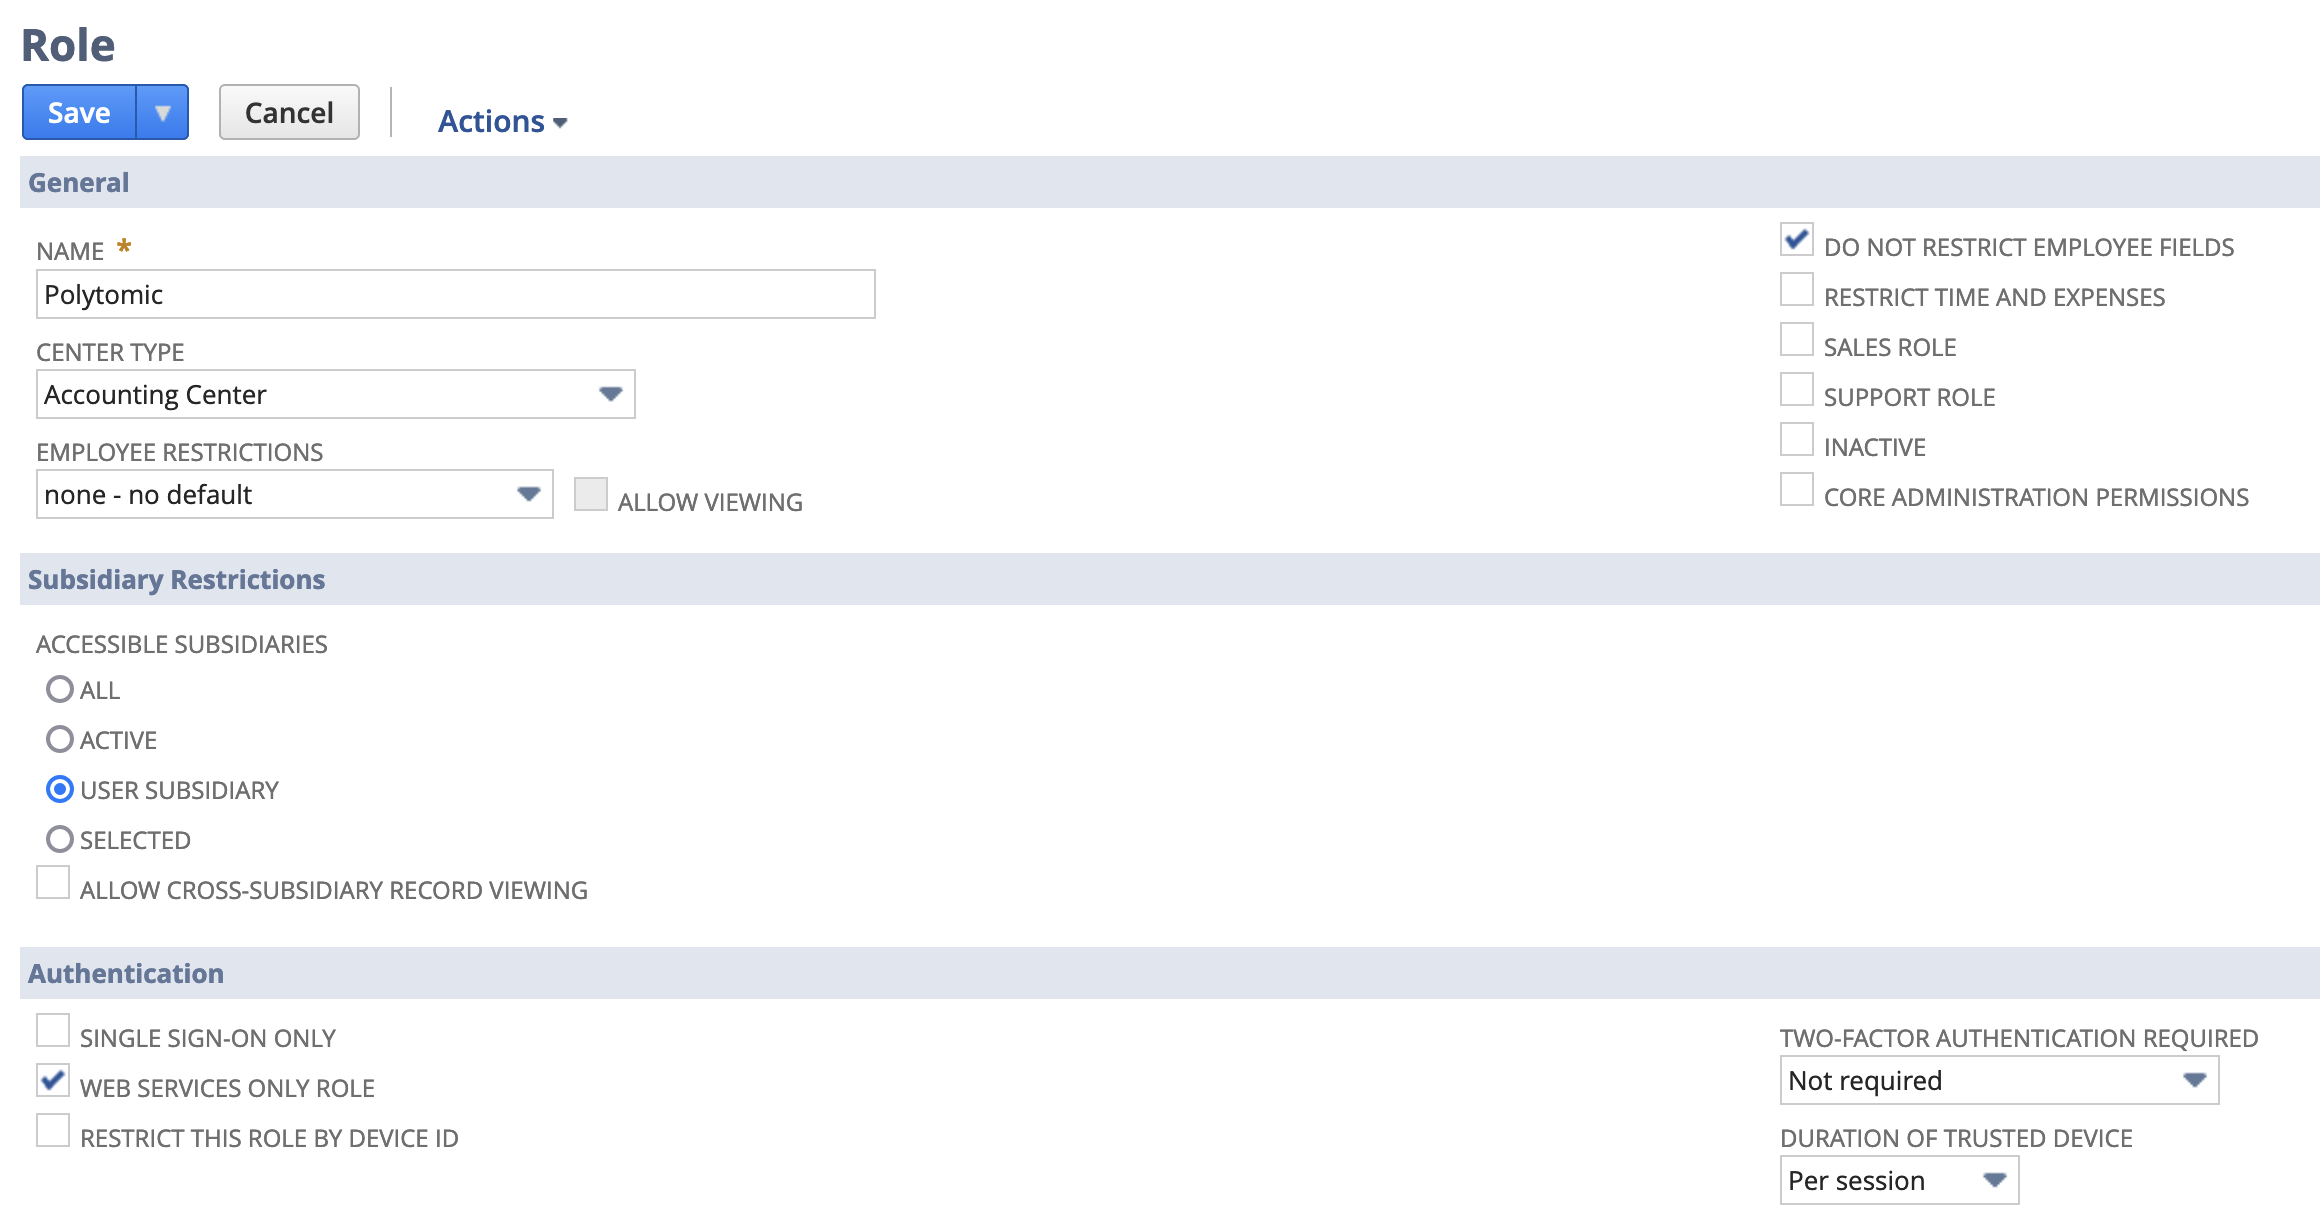
Give this role a name like "Polytomic" and check "Do Not Restrict Employee Fields" and "Web Services Only Role".
Under Permissions the available permissions are listed in several tabs.
Add the following in the Transactions tab:
- Cash Sale (View)
- Cash Sale Refund (View)
- Credit Memo (View)
- Customer Payments (View)
- Customer Deposits (View)
- Customer Refunds (View)
- Find Transaction (View)
- Invoice (Full)
- Invoice Approval (View)
- Sales Order (Full)
Add the following in the Reports tab:
- SuiteAnalytics Workbook (Edit)
- Transaction Detail (View)
Add the following in the Lists tab:
- Accounts (Full)
- Contact Roles (Full)
- Contacts (Full)
- Customers (Full)
- Employee Record (View)
- Items (View)
- Payment Methods (View)
- Vendors (Full)
Add the following permissions in the Setup tab:
- Access Token Management (Full)
- Custom Body Fields (View)
- Custom Column Fields (View)
- Custom Entity Fields (View)
- Custom Fields (View)
- Custom Item Fields (View)
- Custom Lists (View)
- Custom Record Types (View)
- Custom Transaction Fields (View)
- Log in using Access Tokens (Full)
- REST Web Services (Full)
- SOAP Web Services (Full)
- User Access Tokens (Full)
Create a User for Polytomic
We recommend that you create a dedicated user for Polytomic. You can do this by navigating to Setup → Users/Roles → Manage Users.
In the Access tab, assign the role you created above to the user.
If you do not wish to create a dedicated user, at least one existing user must be assigned the role you created for Polytomic.
Create an Access Token
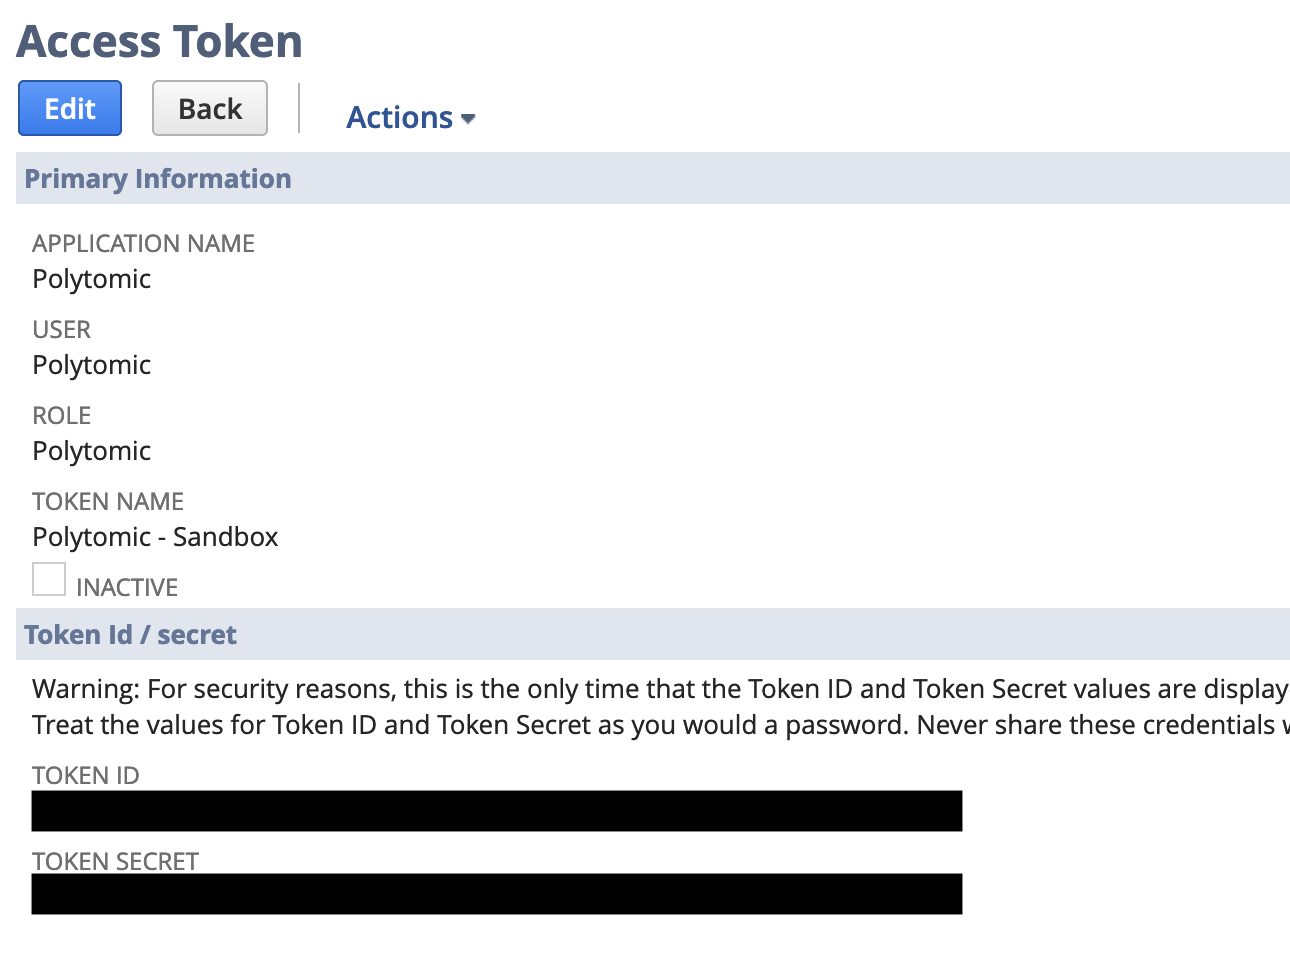
The final step to complete in Netsuite is creating an Access Token for Polytomic.
Navigate to Setup → Users/Roles → Access Tokens → New.
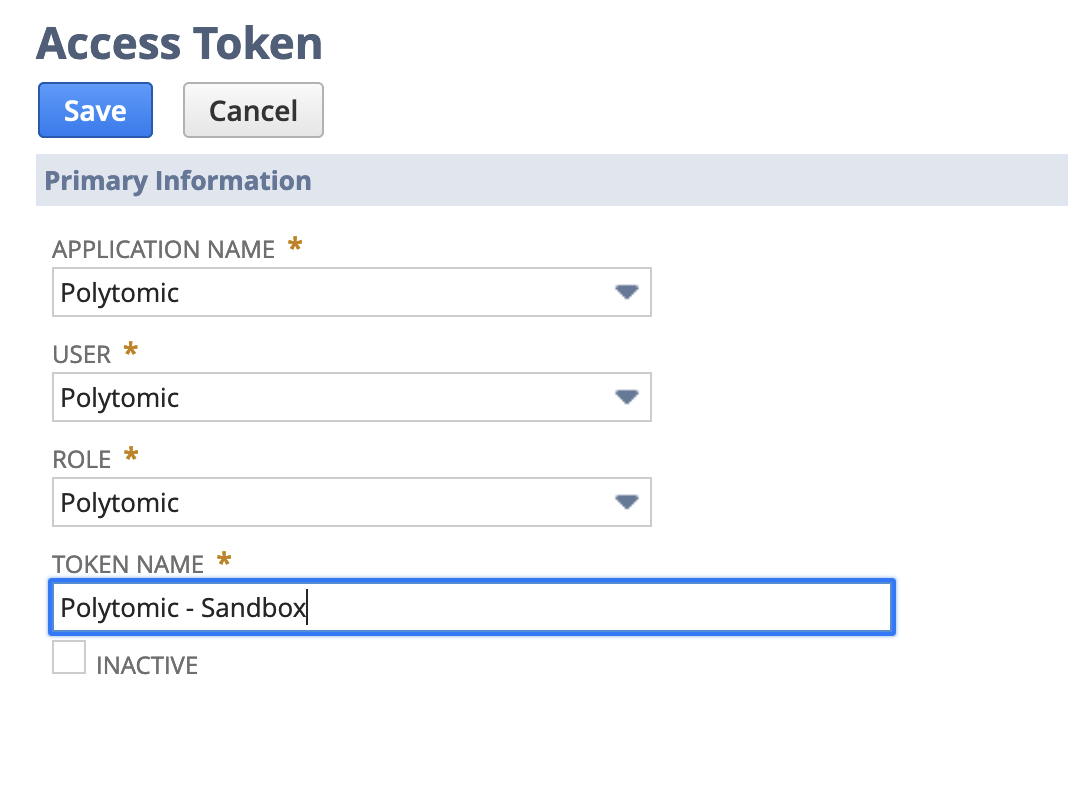
Select the Integration you created as the Application, then select the User and Role you created.
After the access token is created, make note of the Token ID and Token Secret. You'll need these values when connecting Polytomic to NetSuite.
Connecting Polytomic to NetSuite
-
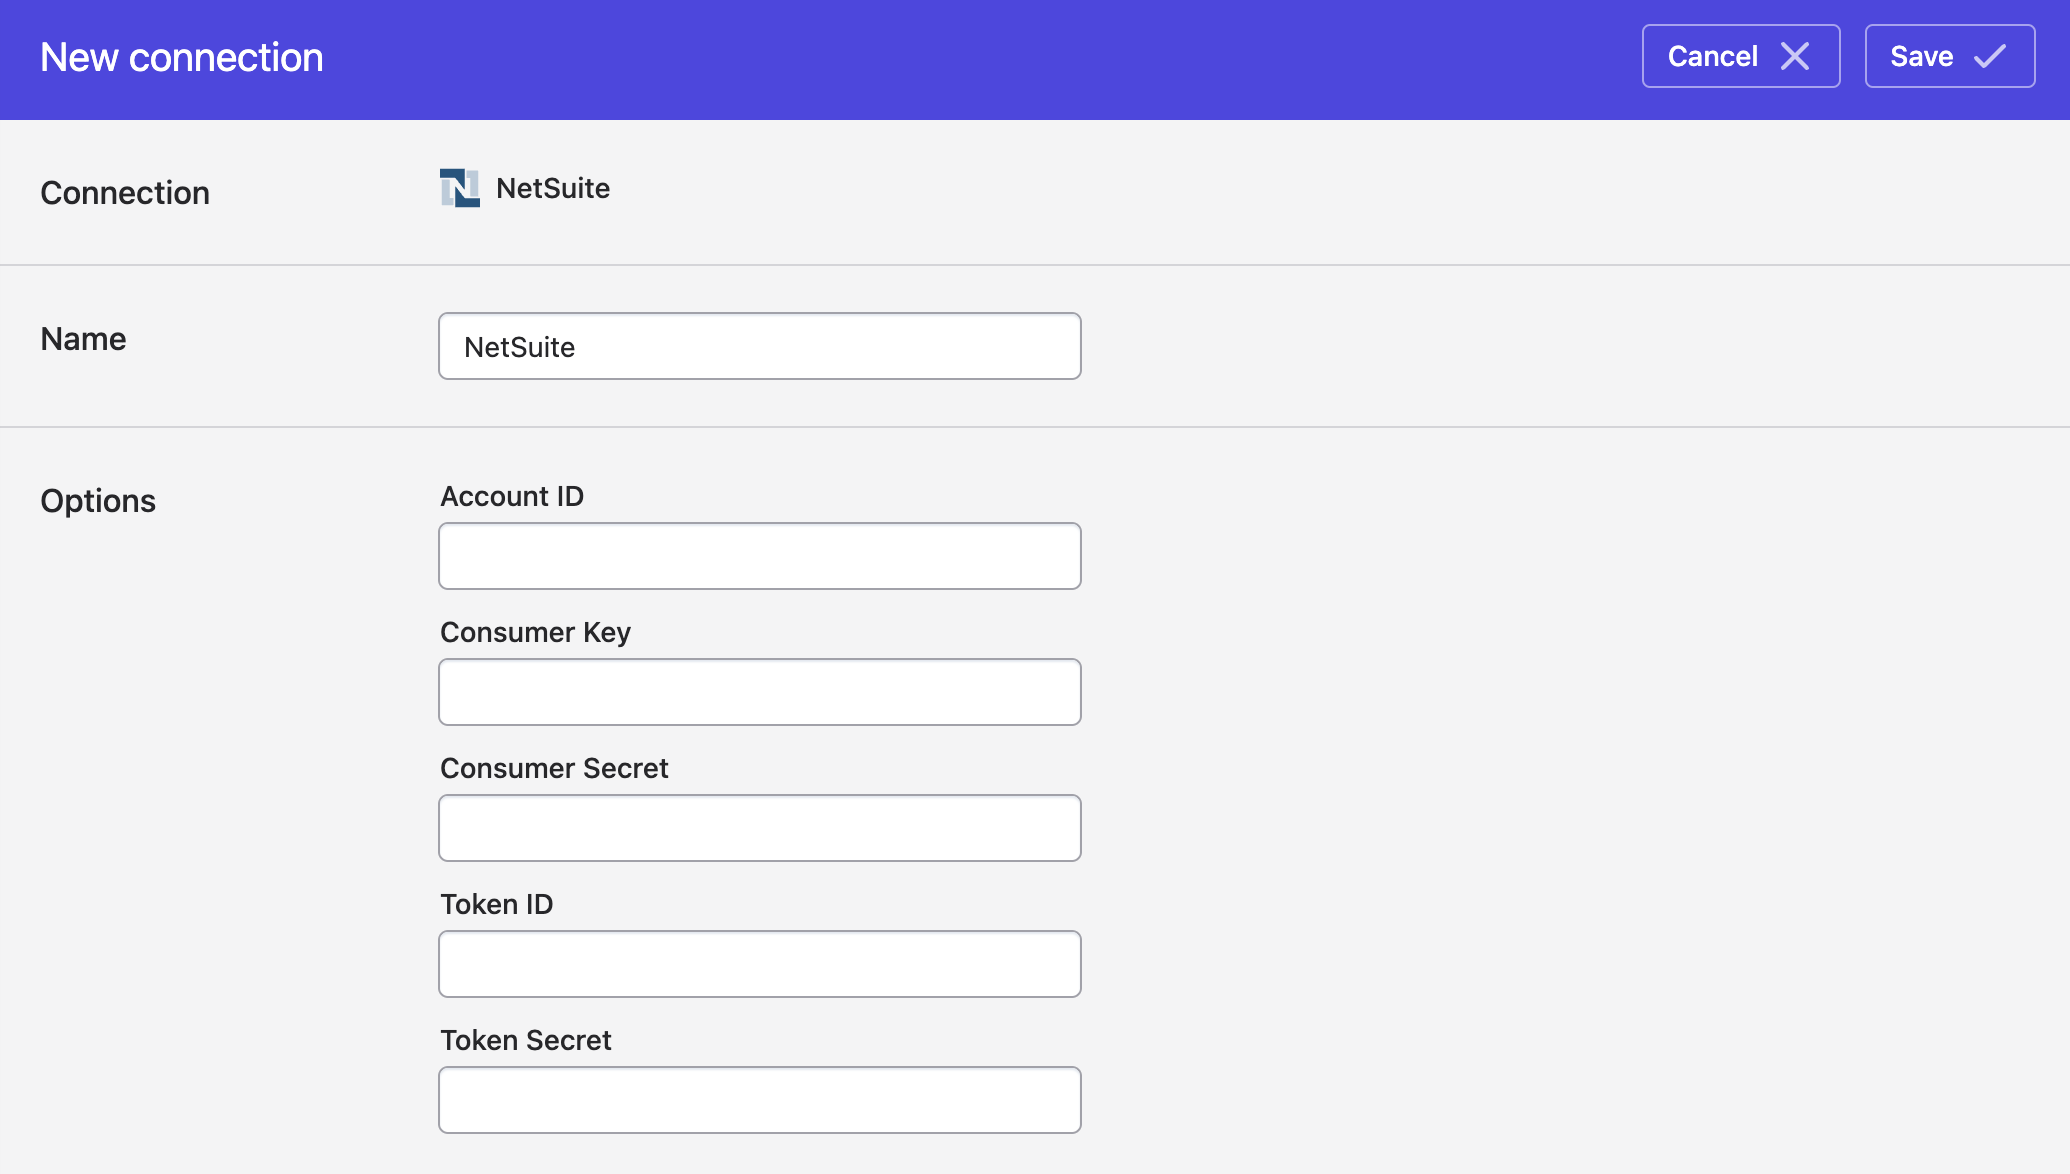
In Polytomic, go to Connections → Add Connection → NetSuite.
-
Pick your connection name and enter your NetSuite Account ID. You can find this by navigating to Setup → Company → Company Information in NetSuite.
-
Finally, enter the Consumer Key, Consumer Secret, Token, and Token Secret provided by NetSuite during all the previous steps.
- Click Save.
NetSuite IP restrictions
When saving your NetSuite connection, you may be presented with an error that says Request to NetSuite unsuccessful.
The likeliest cause of this is your NetSuite instance having IP address restrictions turned on. If so, you'll need to add Polytomic's IP addresses to the IP address allow list in NetSuite. If you are running Polytomic on-premises, you'll instead have to add the IP addresses of your internal Polytomic hosts.
Syncing from NetSuite
Use Polytomic's Bulk Syncs to sync (ELT) from NetSuite to your data warehouses, databases, and cloud storage buckets like S3.
Use Polytomic's Model Syncs to sync from NetSuite to your other applications like Salesforce, HubSpot, and others.
Concurrency limits
Due to NetSuite's concurrency limits, Polytomic will only sync four objects from NetSuite at a time. The rest will be automatically queued behind the batch of four.
Syncing to NetSuite
Use Polytomic's Model Syncs to sync to NetSuite from your data warehouses, databases, SaaS applications like Salesforce and HubSpot, and cloud storage buckets like S3.
Updated 10 months ago